



How to make your own website on GitHub Pages
I wrote this guide in 2019 for a course where everyone had to put a personal website online. GitHub Pages hosts it for free, and you only need a browser, Git and a text editor. Every step has a screenshot, so you can check that your screen looks the same before you move on.
GitHub has changed since 2019
The screenshots are from 2019 and some buttons have moved. The Pages settings now live under Settings → Pages, new repositories use a branch called
maininstead ofmaster, and the green Code button replaced “Clone or download”. The steps are otherwise the same.
1. Create a GitHub account
-
Go to github.com and click Sign up at the top right. Pick your username carefully: your site will live at
yourusername.github.io.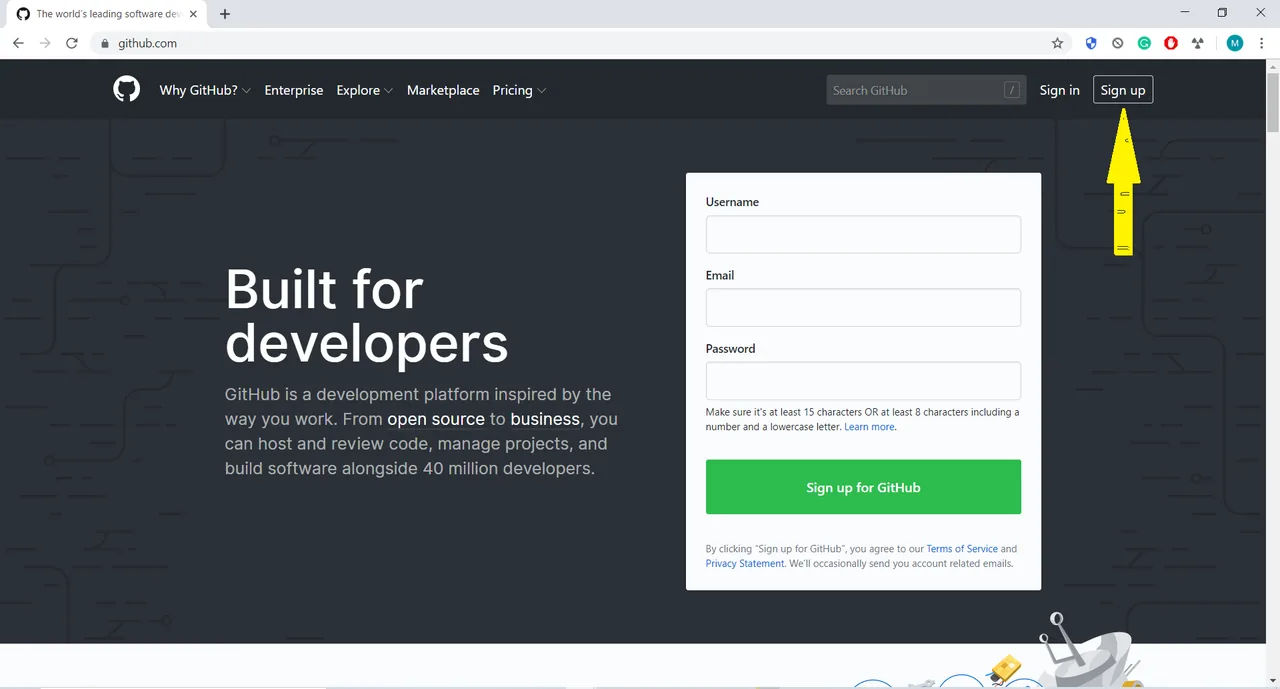
-
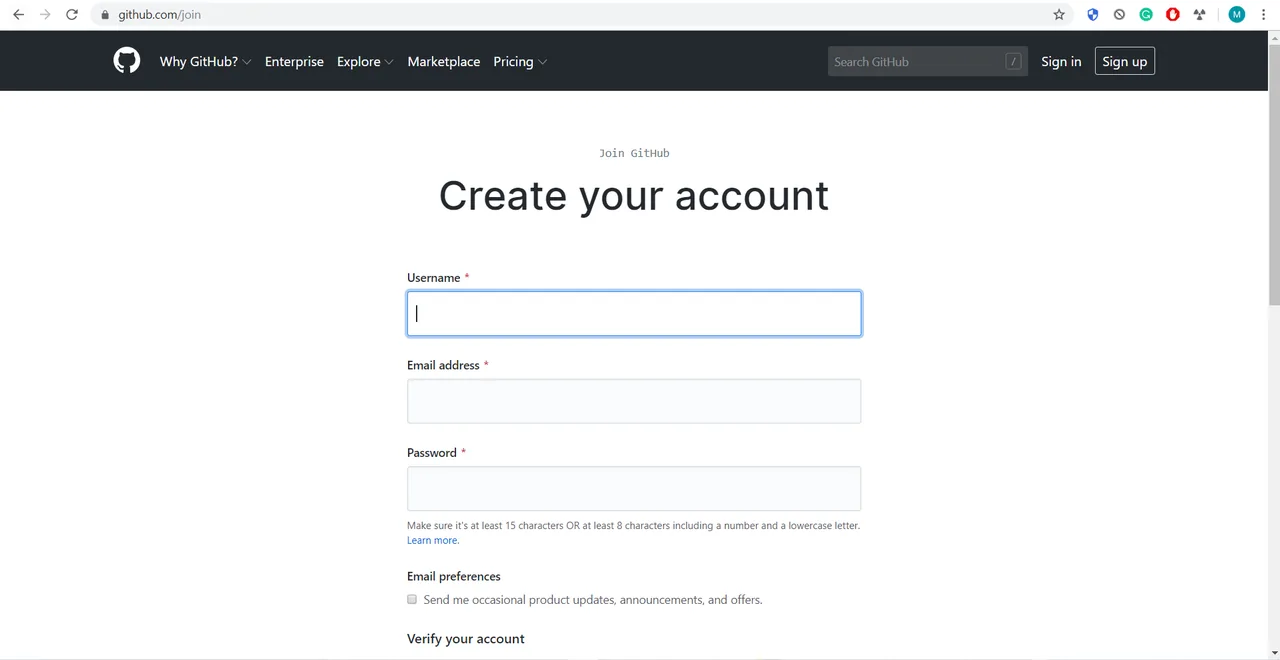
Fill in the form.
-
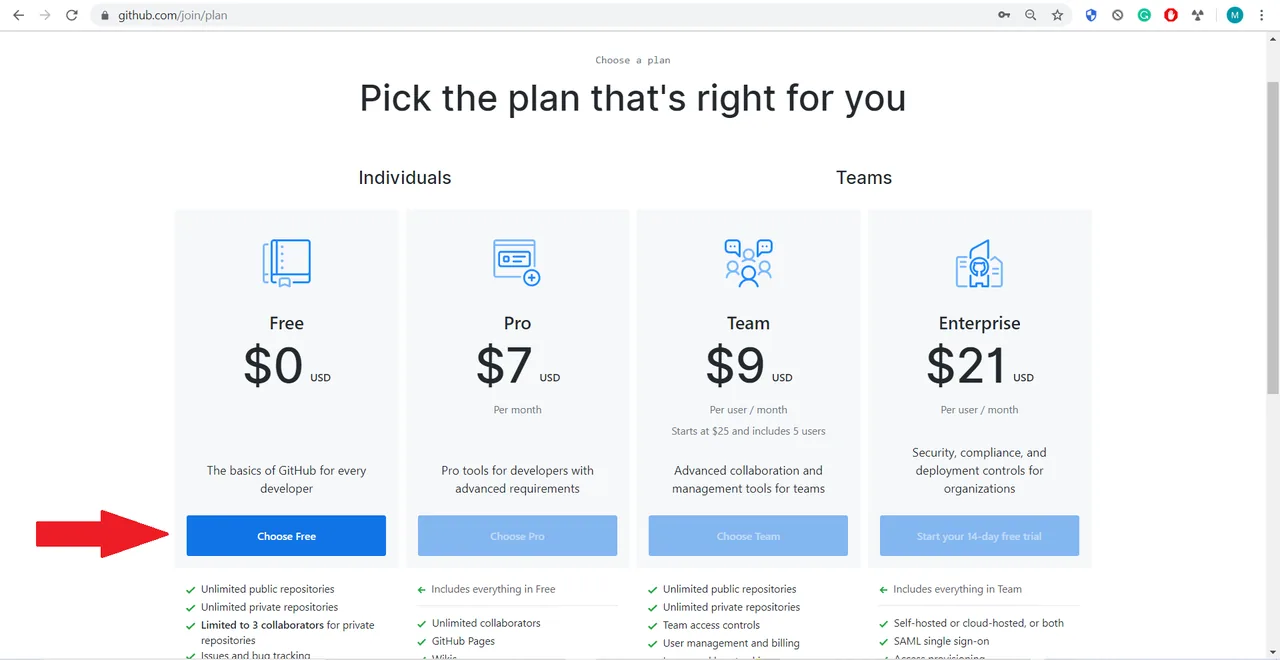
Choose the Free plan.
-
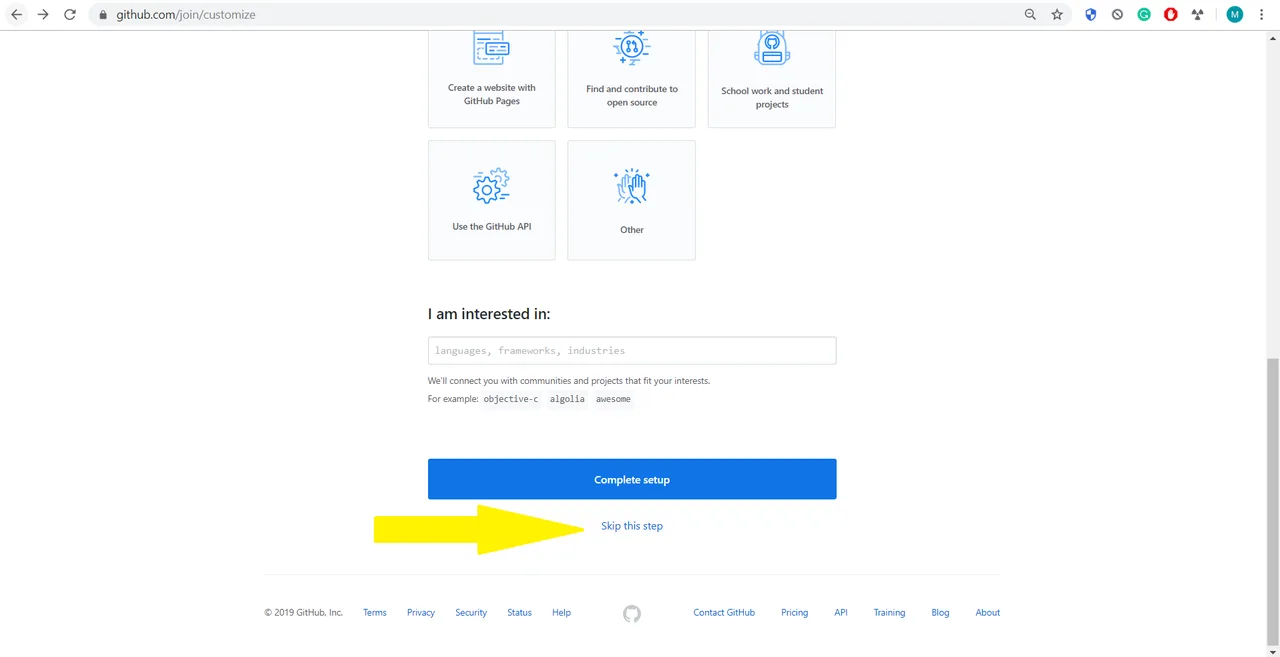
The “customize” page is optional. You can skip it.
-
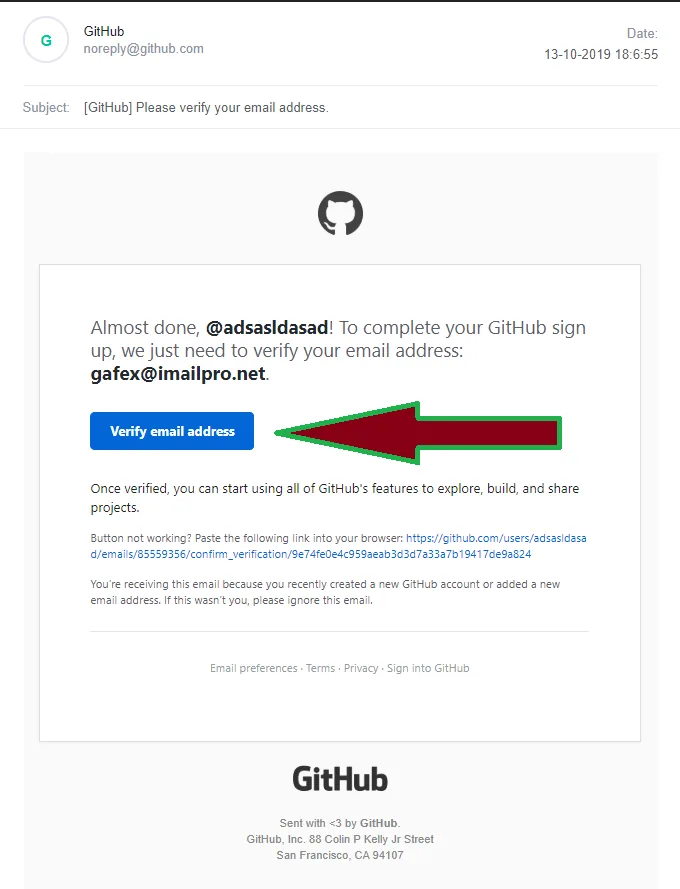
GitHub sends you an email. If it isn’t in your inbox, check spam.

-
Open it and click Verify email address.
2. Copy the website template
-
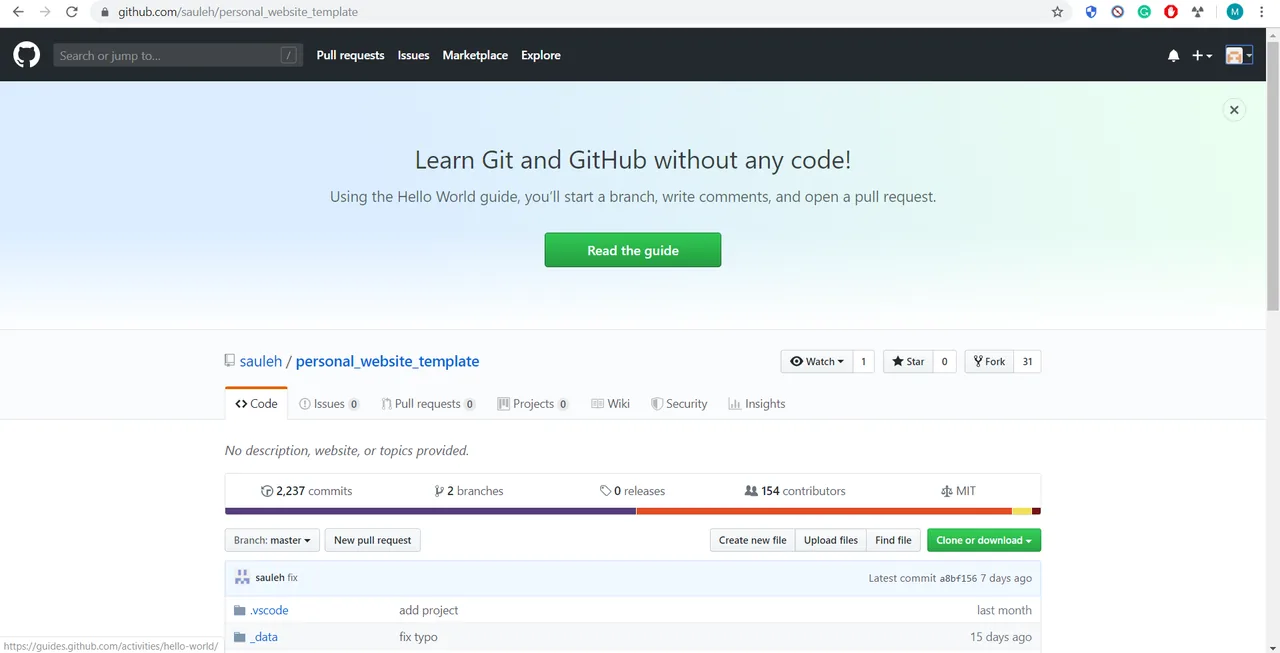
Open the personal website template.
-
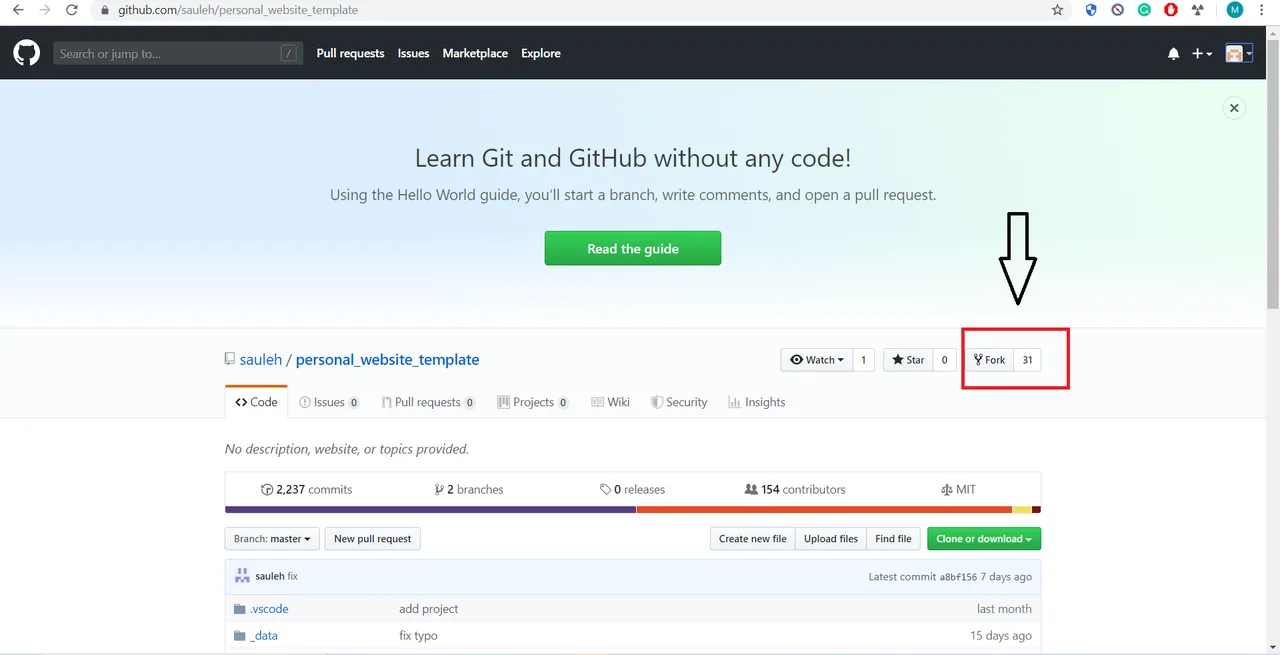
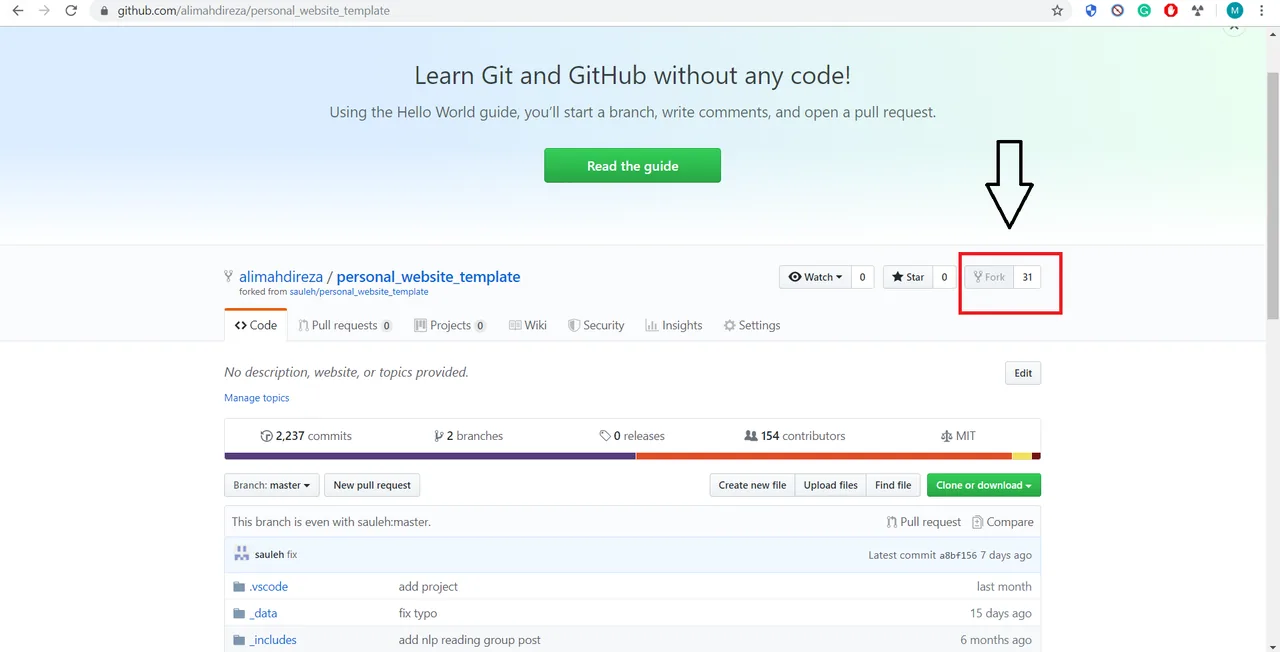
Click Fork at the top right. This copies the template into your own account.
-
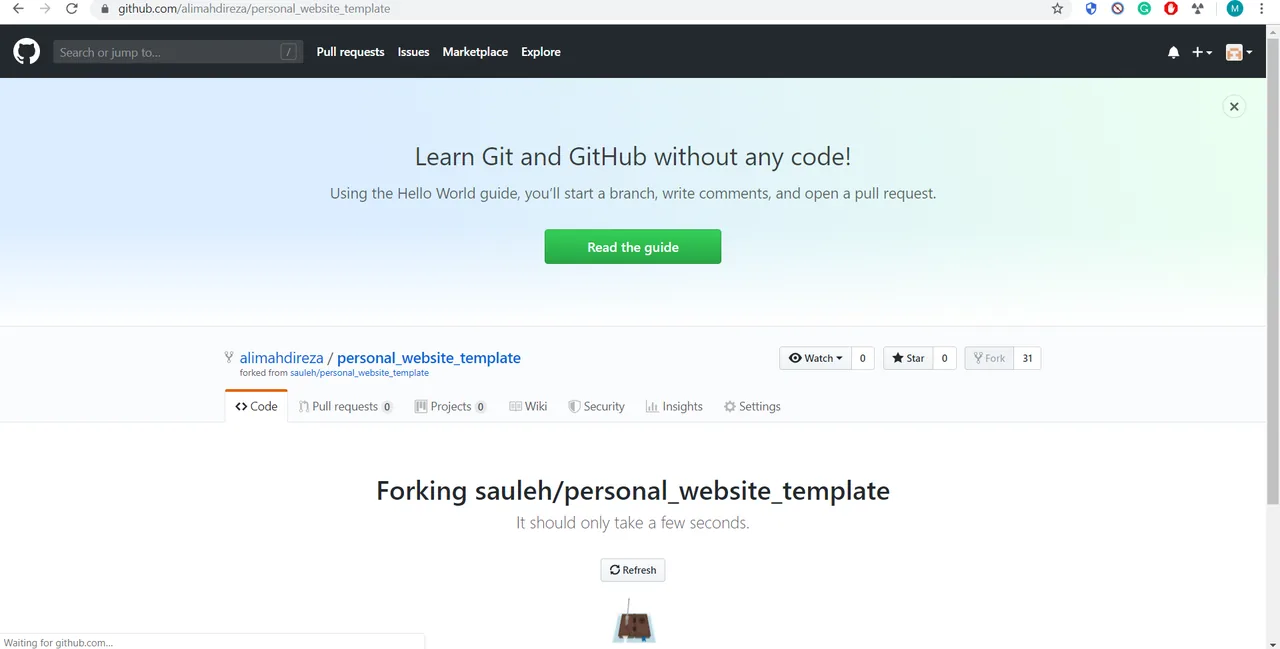
If you see a “Forking…” page, wait a few seconds or refresh. If you don’t see it, that’s fine too.
-
When it’s done you’re on your own copy, and the Fork button is greyed out.
-
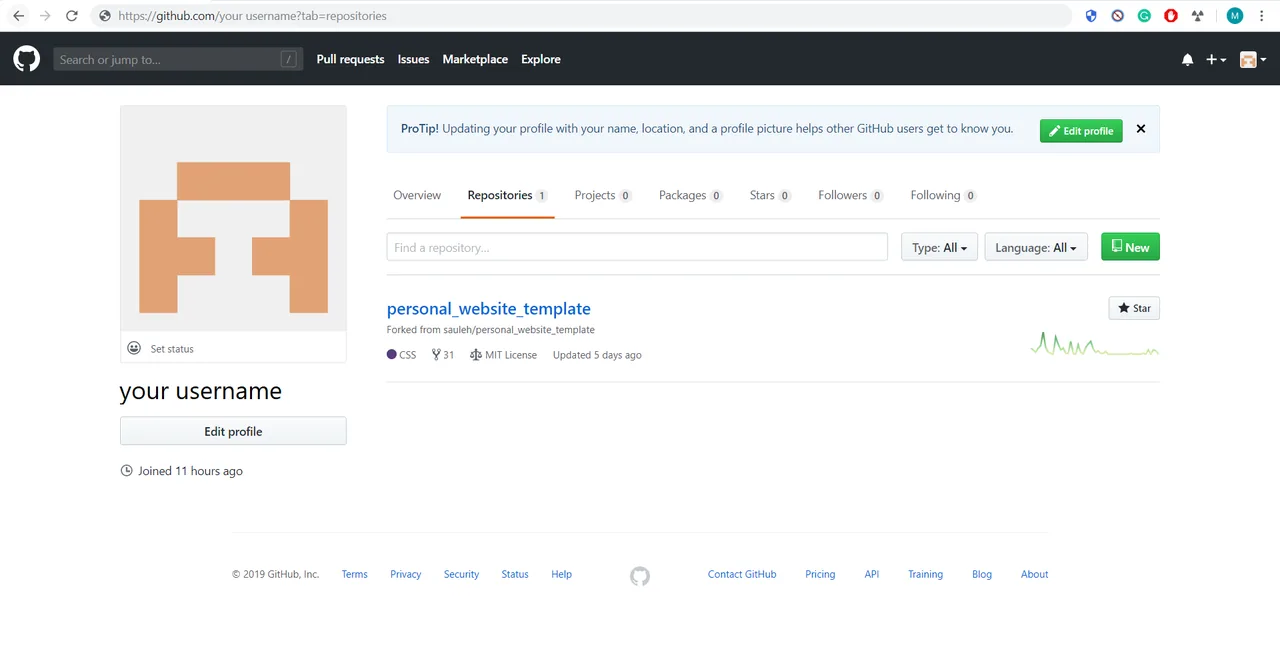
Open your repositories:
https://github.com/yourusername?tab=repositories(use your username).
You should see the template in the list.
-
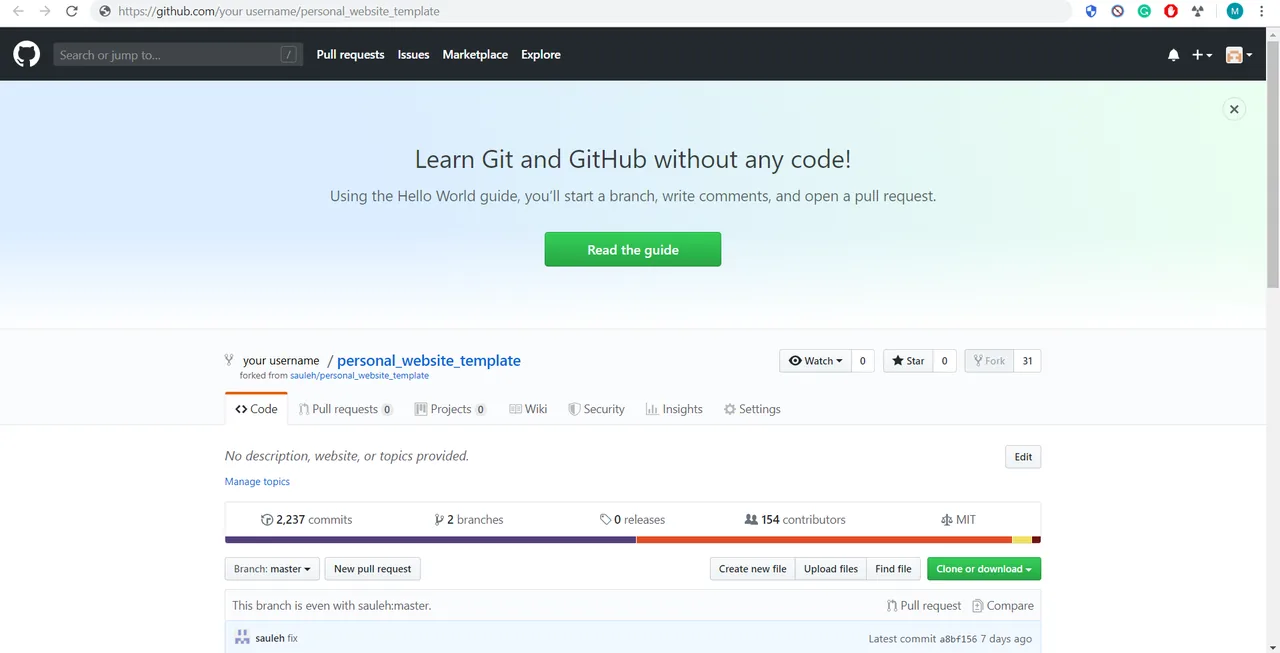
Click personal_website_template, or go straight to
https://github.com/yourusername/personal_website_template.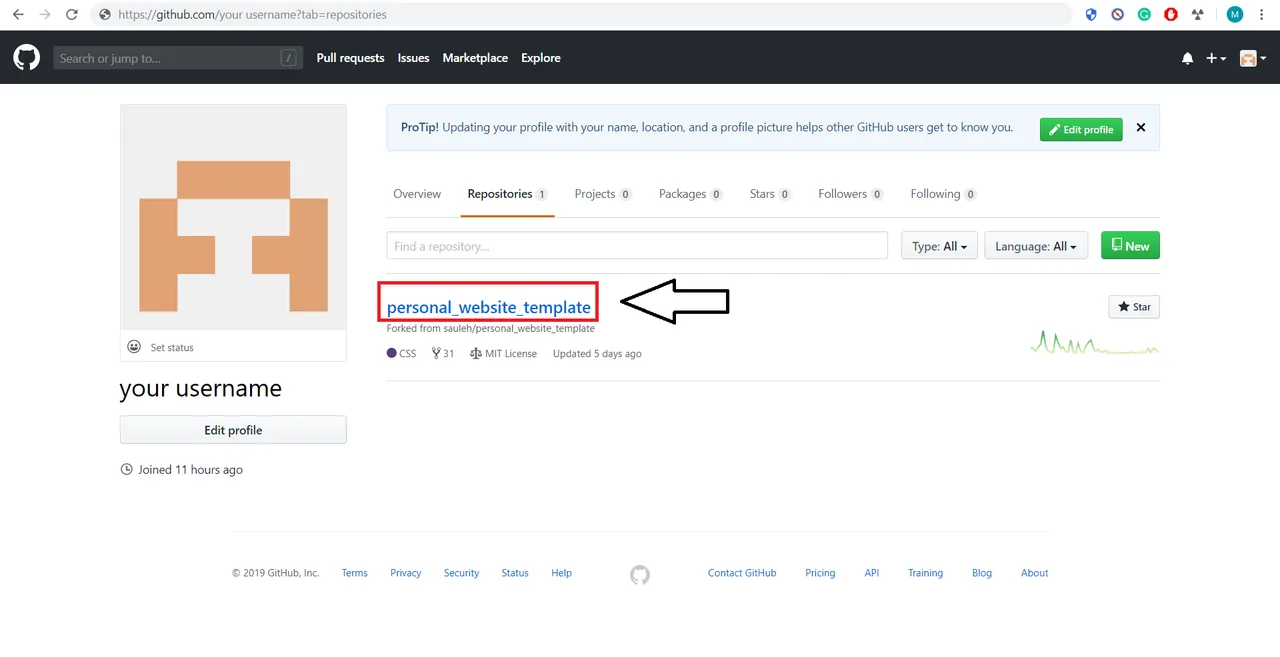
-
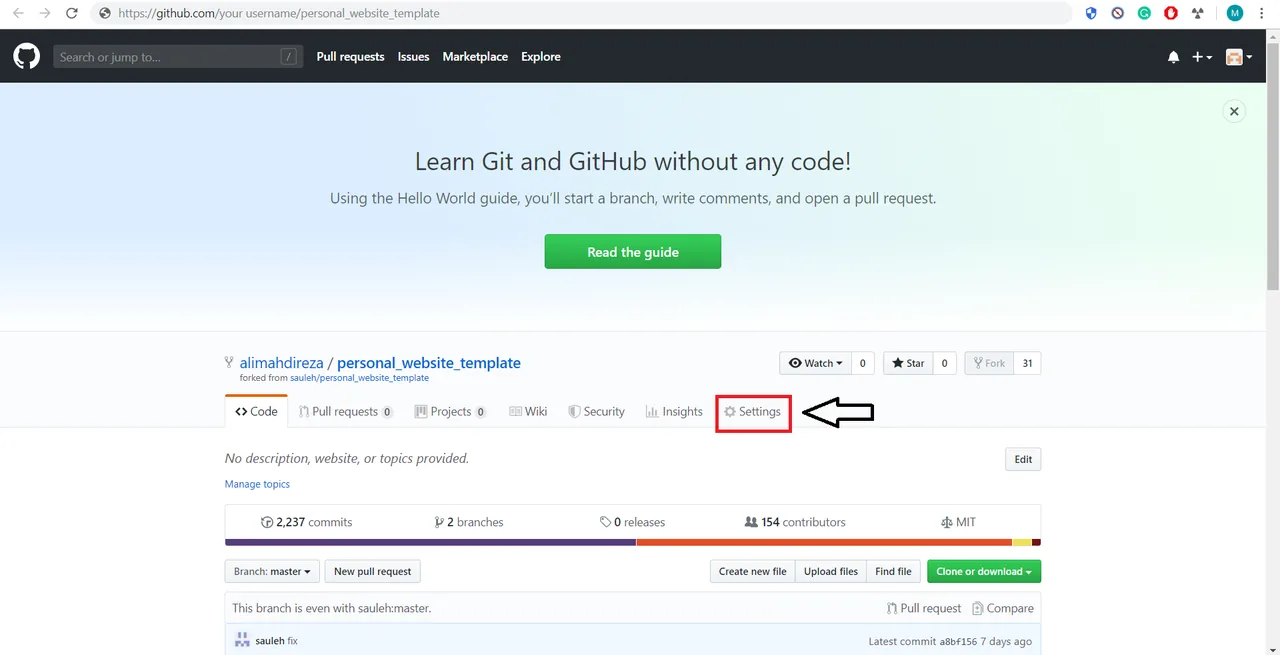
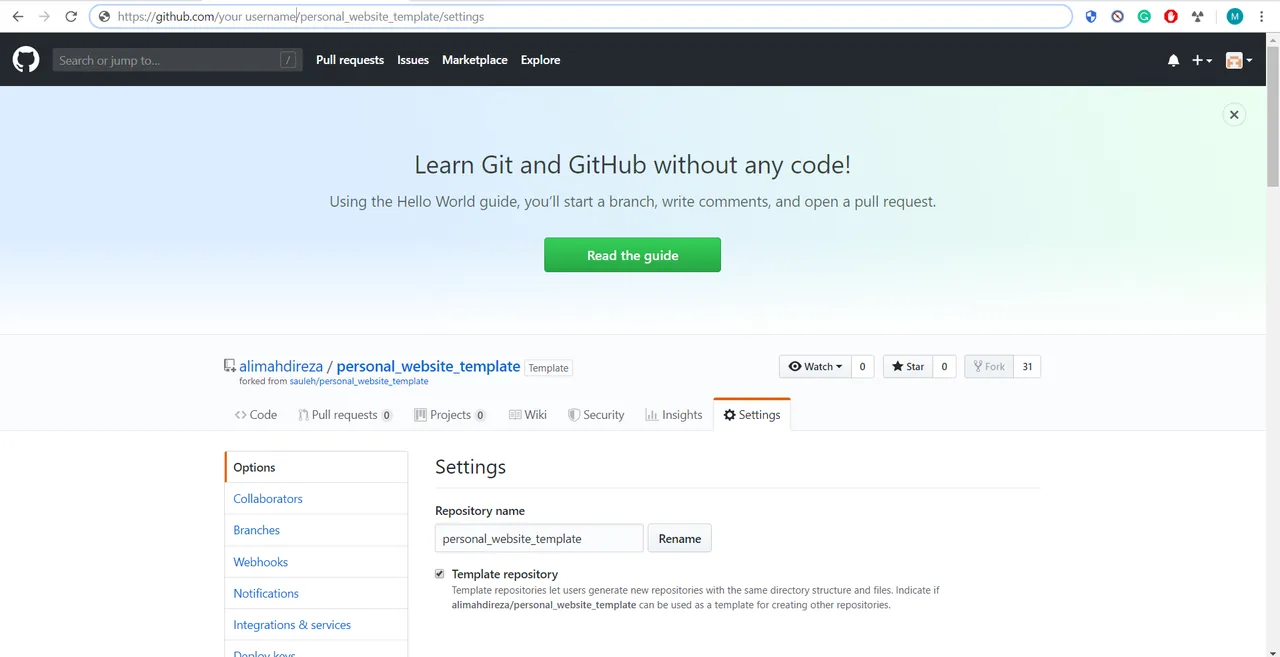
Click Settings.
-
Rename the repository to
yourusername.github.io. If your username isali, the name isali.github.io.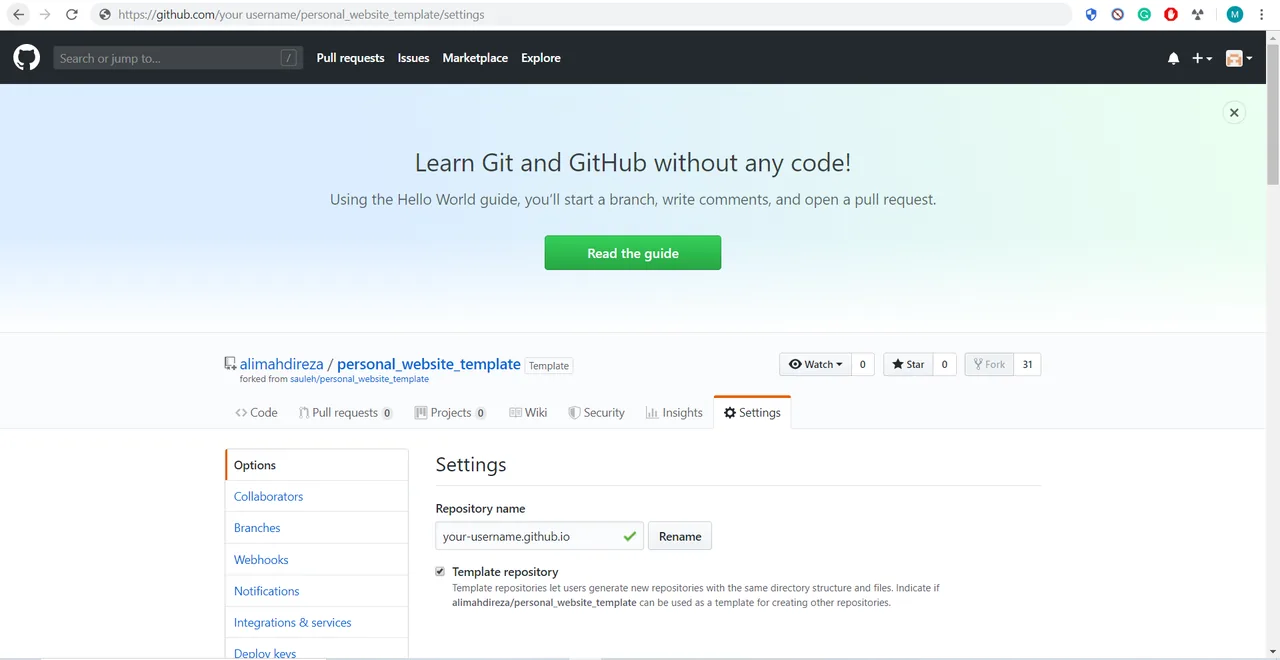
-
Scroll down to GitHub Pages and set the source to the master branch (on today’s GitHub: Settings → Pages, branch
main). If it’s already set, leave it.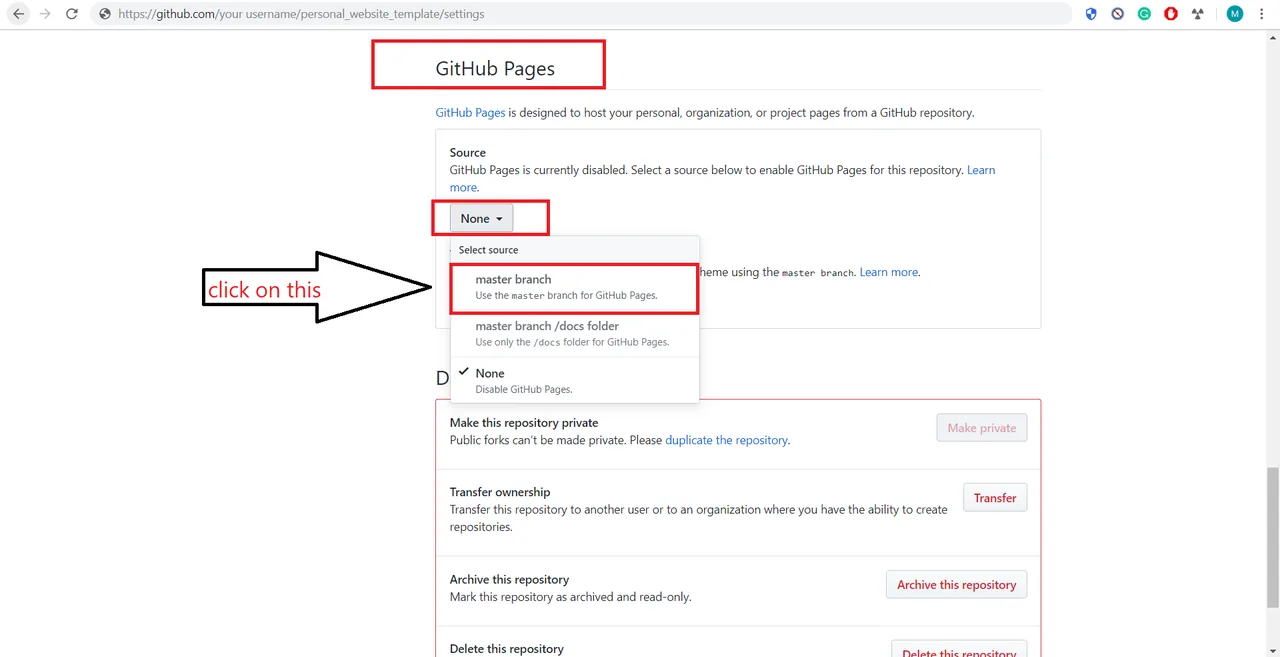
-
Open
yourusername.github.ioin your browser. You should see the template site. It can take a minute or two the first time.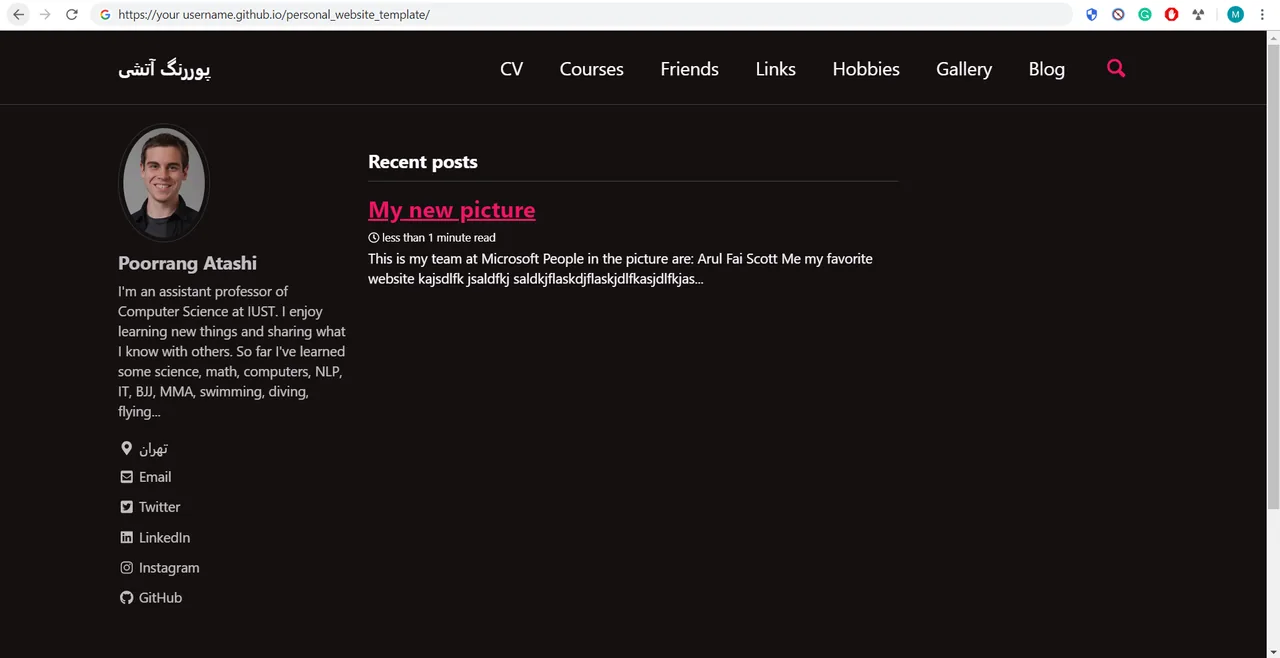
3. Install Git and download your site
-
Go to git-scm.com/downloads.
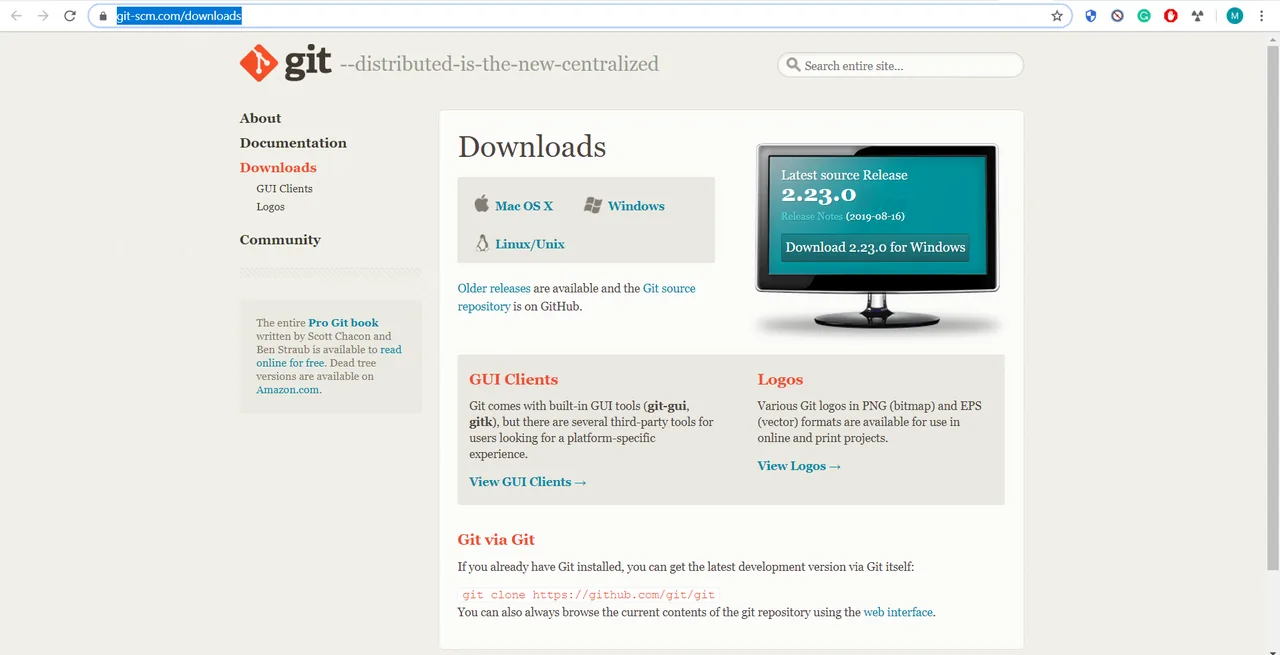
-
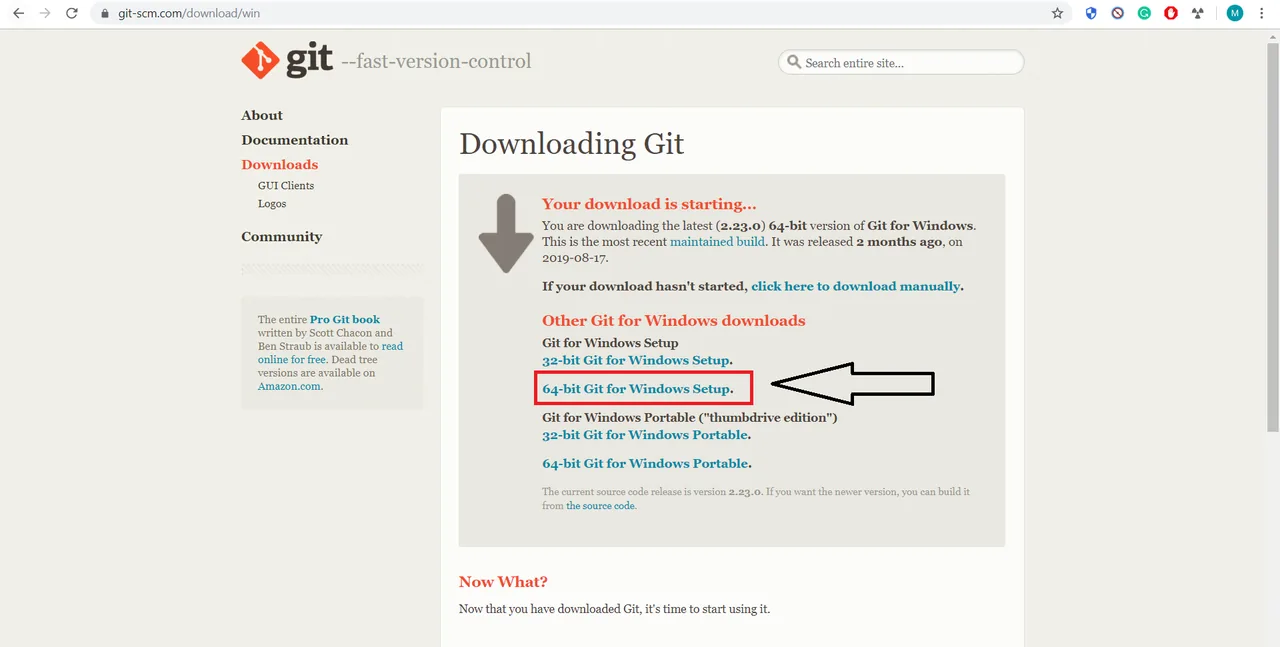
Click the button for your system. I used 64-bit Windows 10, so I clicked Windows.
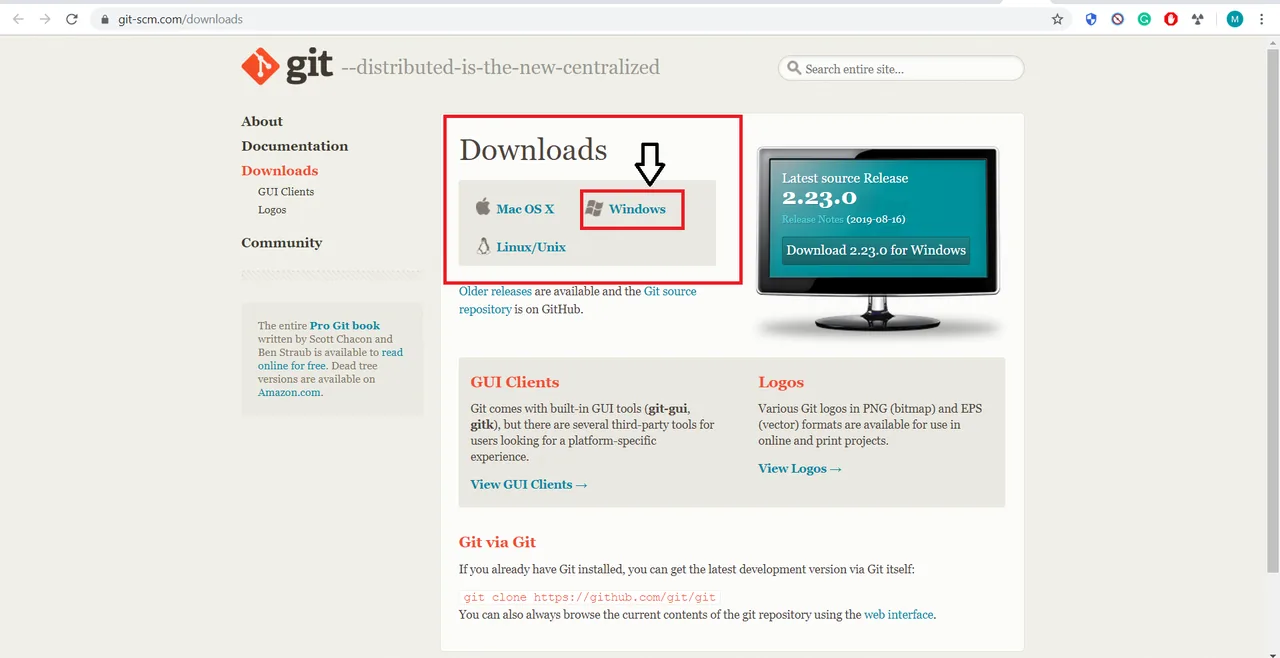
-
The download should start on its own. If it doesn’t, go to git-scm.com/download/win
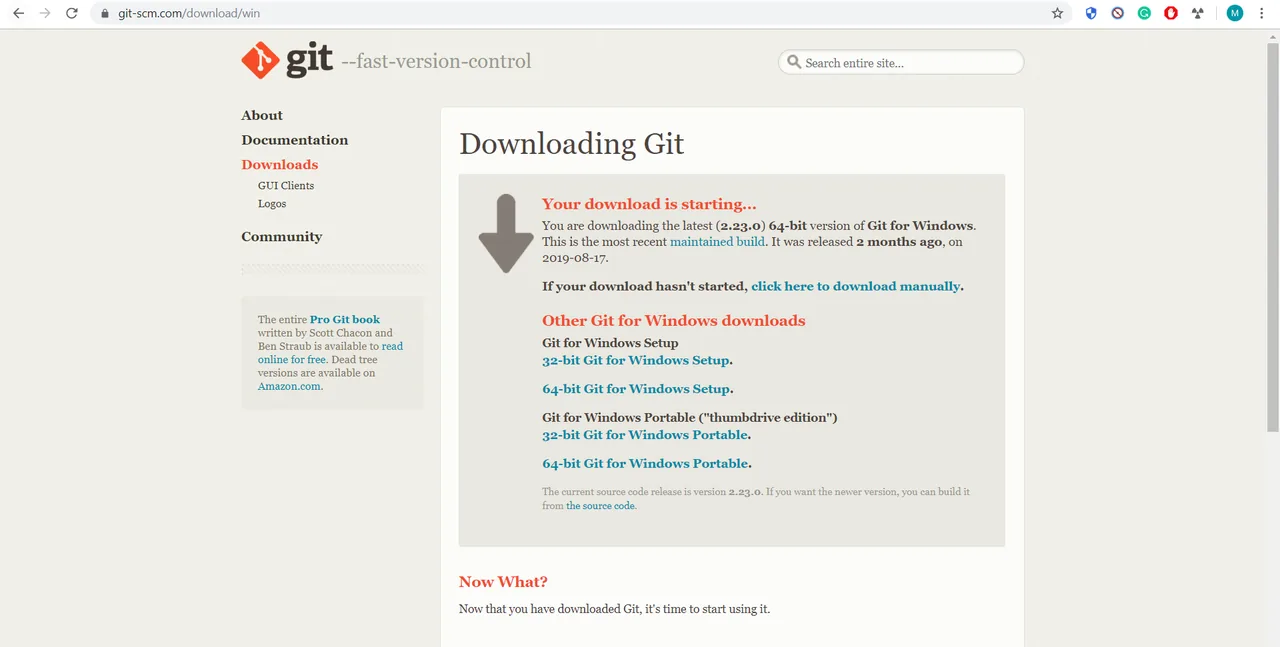
and pick the installer that matches your Windows (for most people, 64-bit Git for Windows Setup).
-
Run the downloaded
.exe.
-
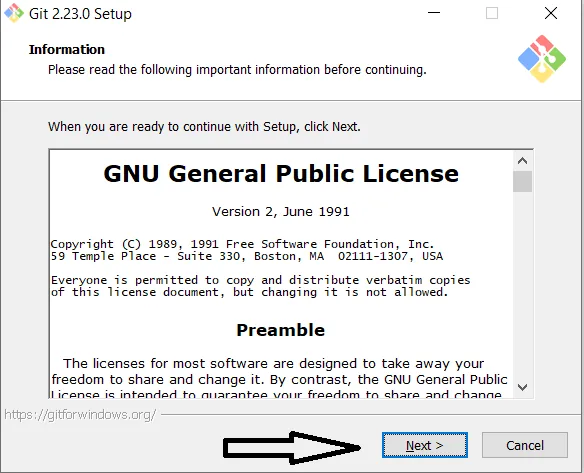
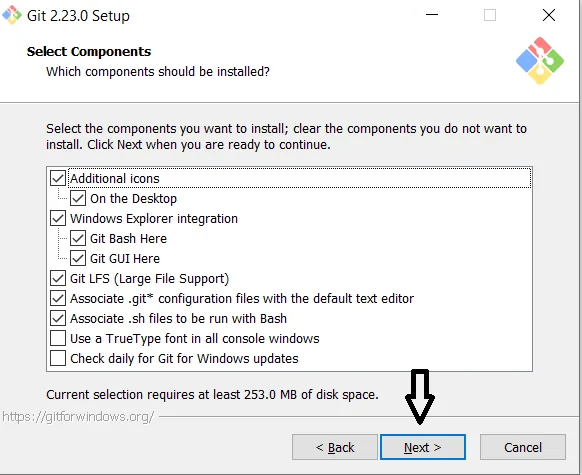
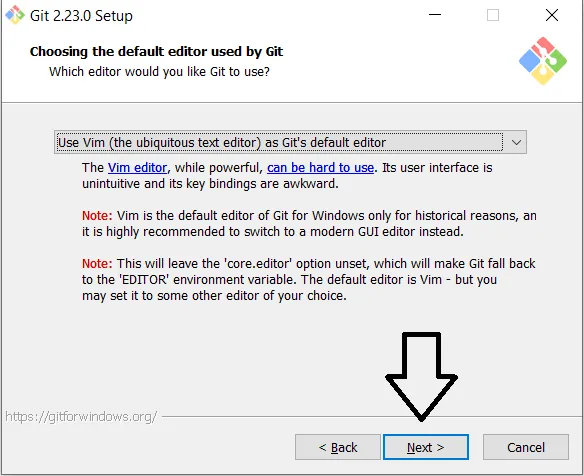
Click Next on every screen. The defaults are fine.
Show all eight installer screens
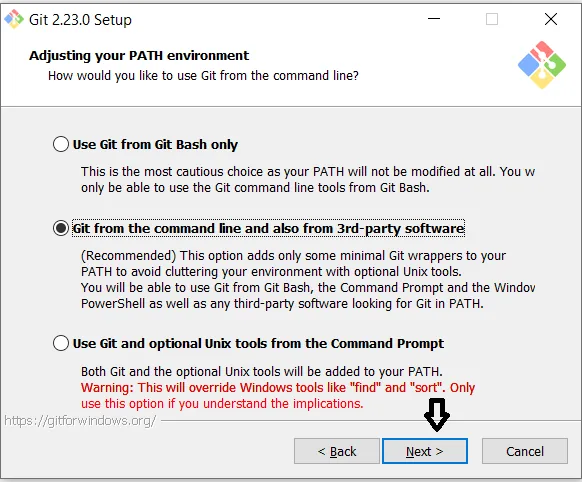
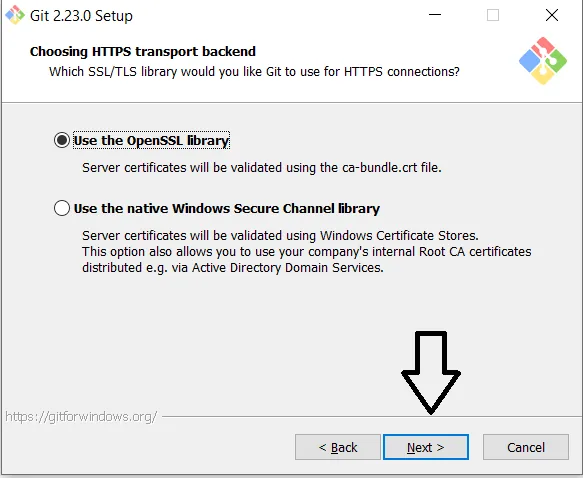
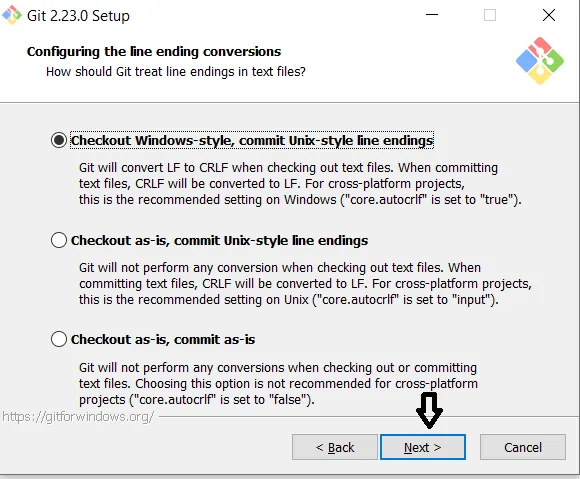
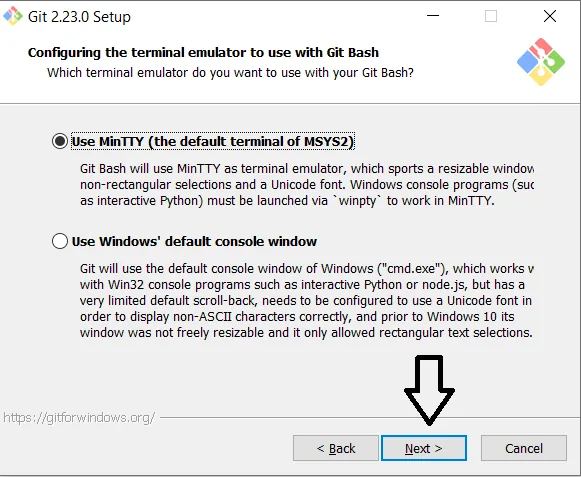
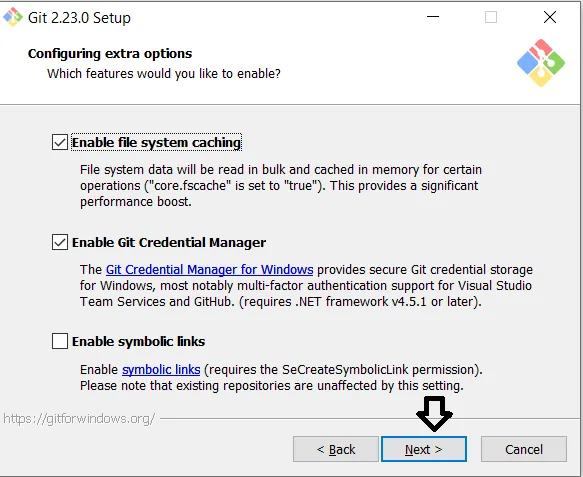
-
On the last screen click Install,
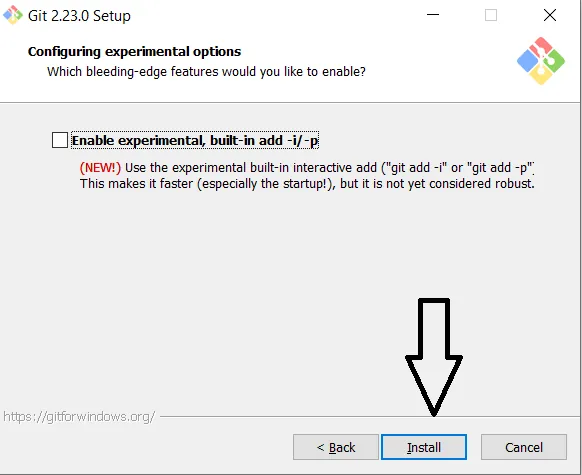
then Finish.
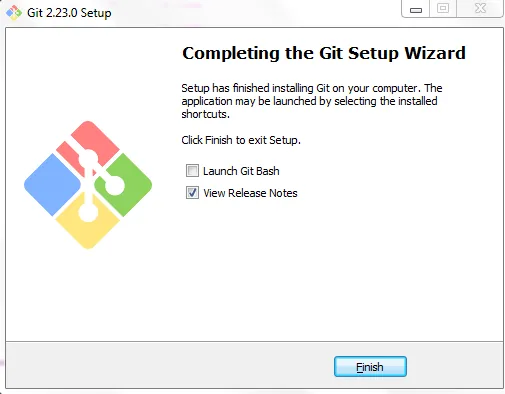
-
To check that it worked, type
cmdin the Windows search box
and open Command Prompt.
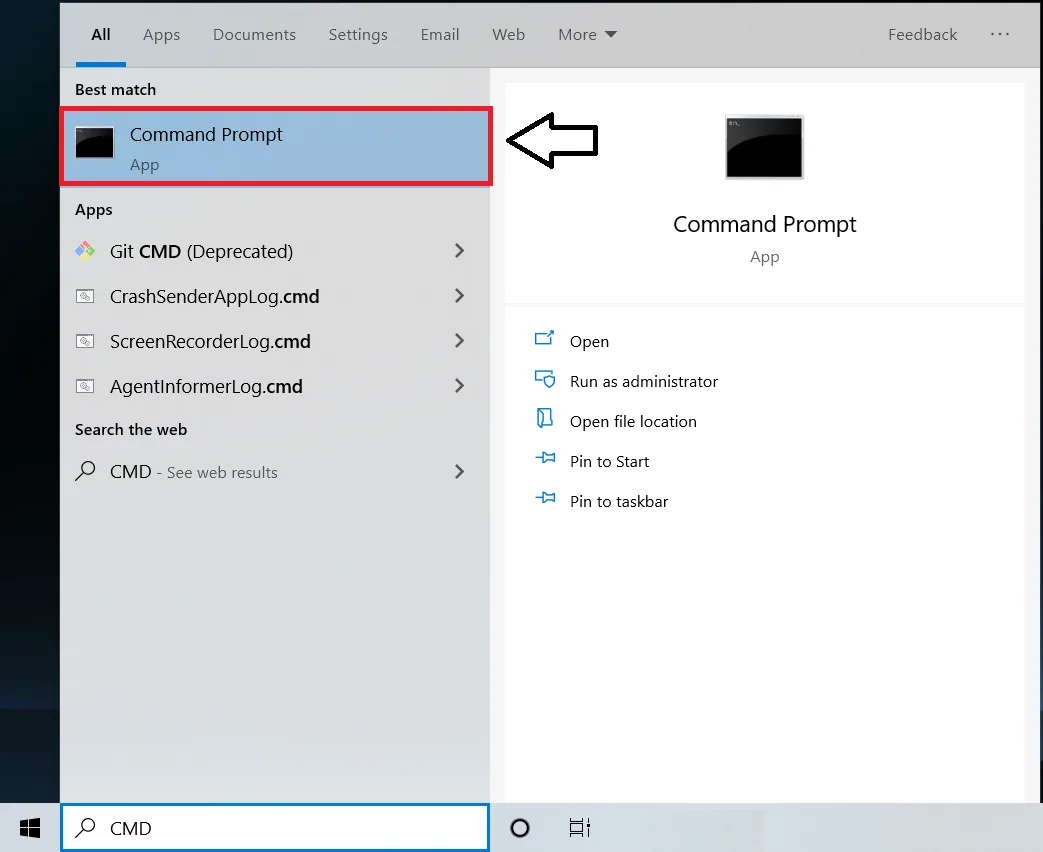
Type
gitand press Enter. If you see a list of Git commands, Git is installed.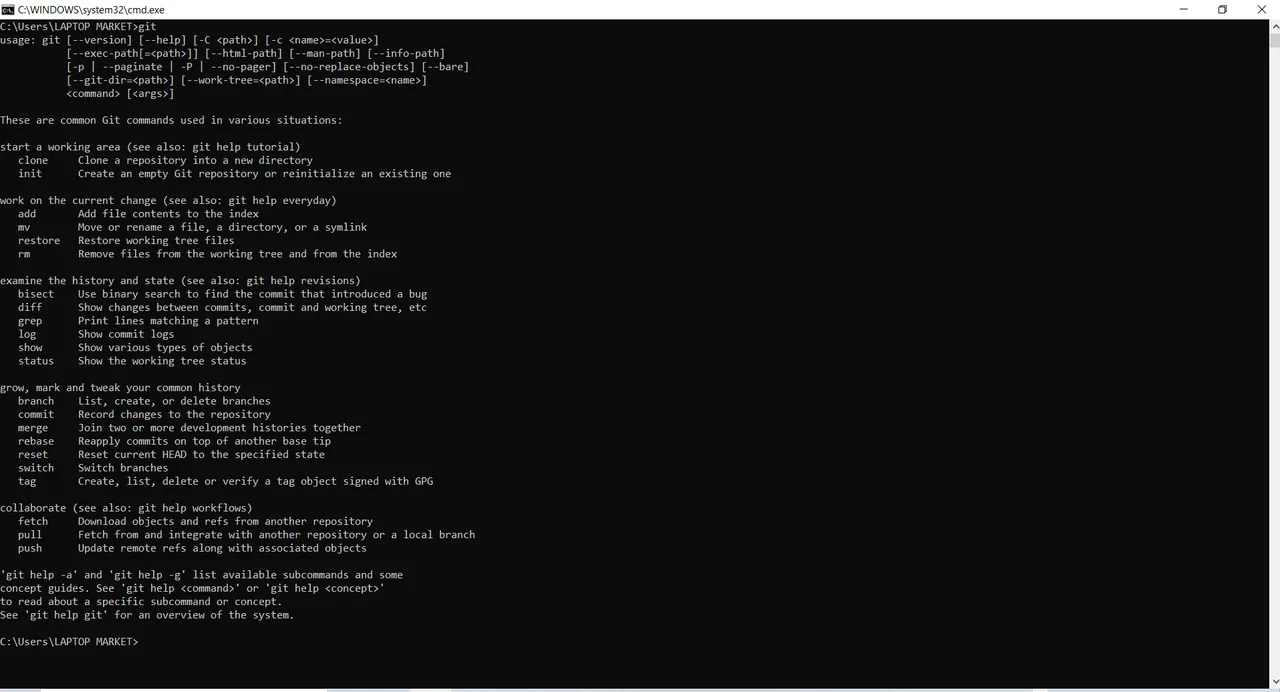
-
Back on GitHub, open your
yourusername.github.iorepository.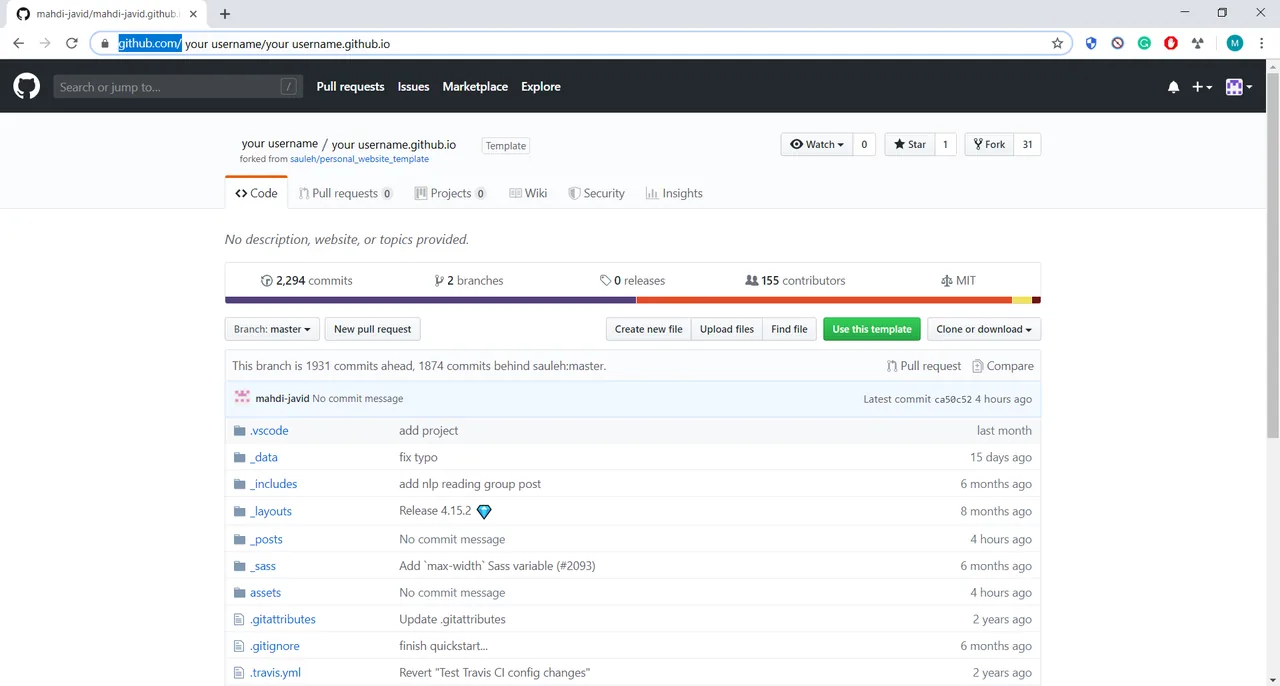
-
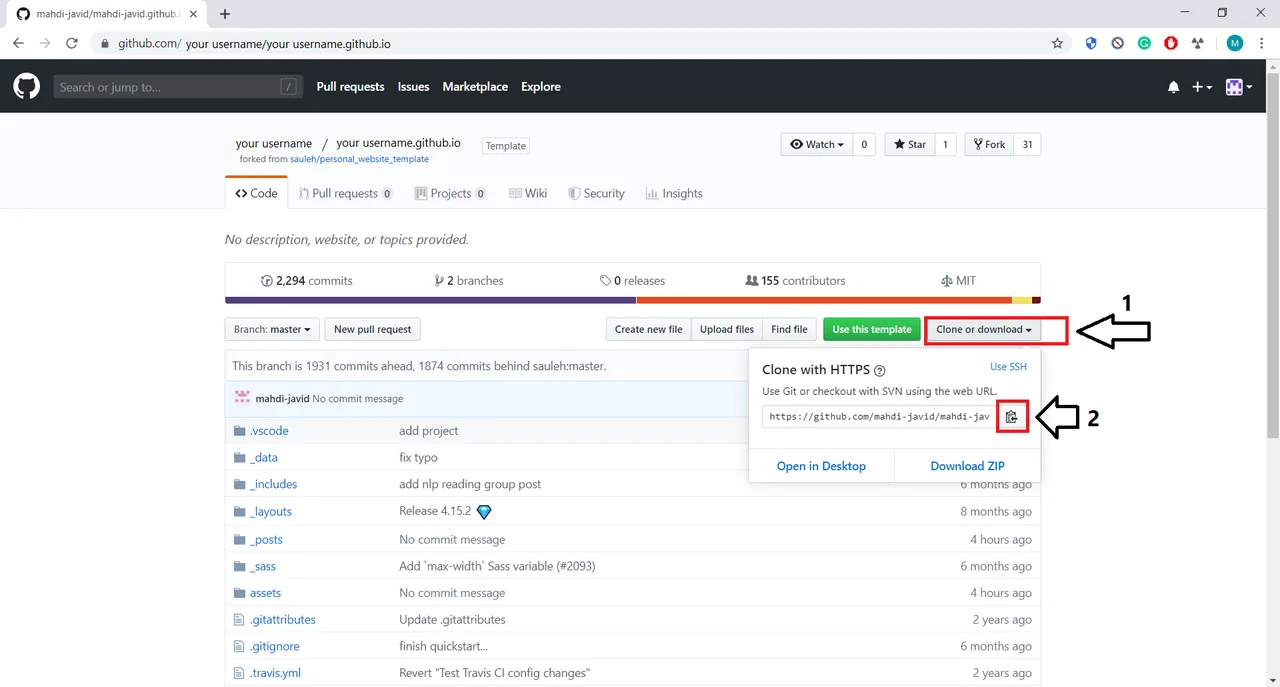
Click Clone or download (today: the green Code button) and copy the URL.
-
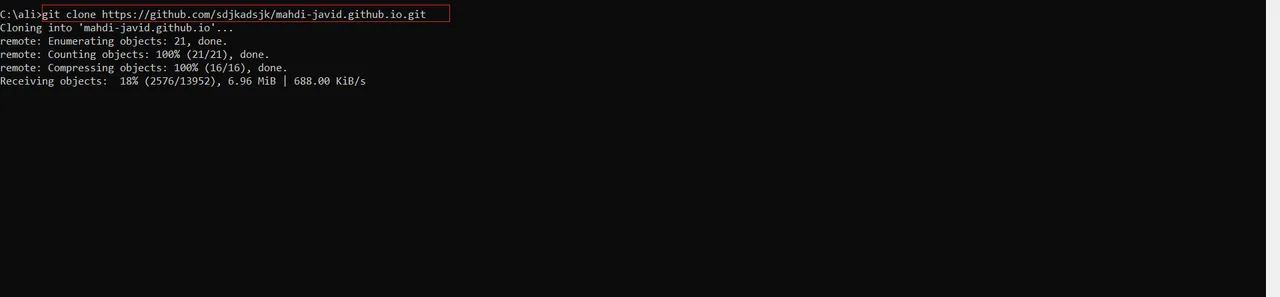
In Command Prompt, make a folder for your projects and clone the site into it:
cd /d C:\
md dev
cd dev
git clone https://github.com/yourusername/yourusername.github.io.git
Git prints a few lines while it downloads. When it stops, the site is on your computer.
4. Open the site in VS Code
-
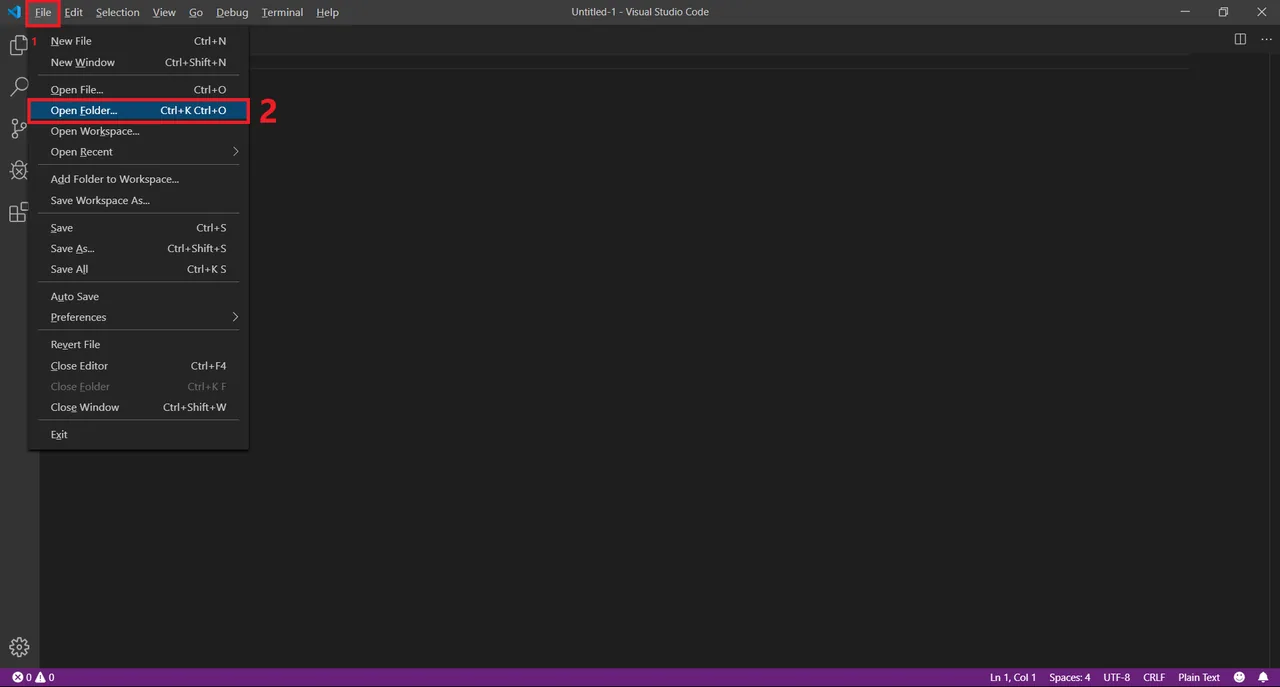
Open Visual Studio Code, then File → Open Folder (Ctrl+K Ctrl+O).
-
Pick the
C:\dev\yourusername.github.iofolder and click Select Folder.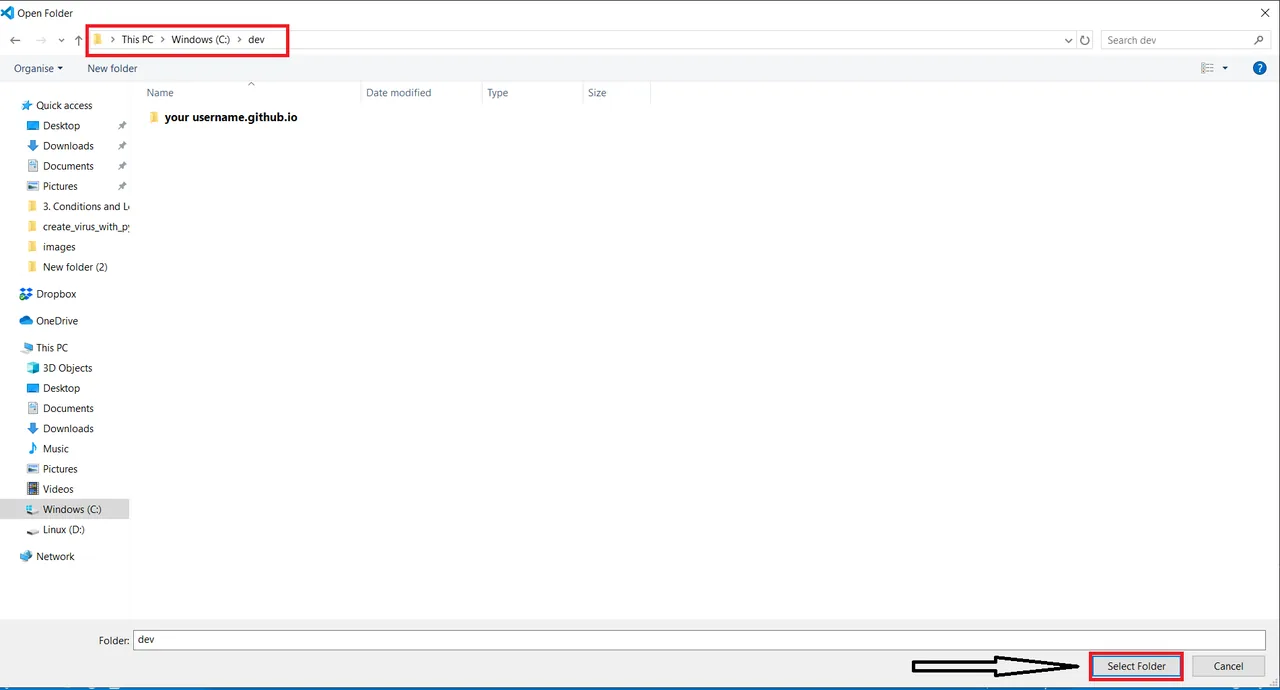
-
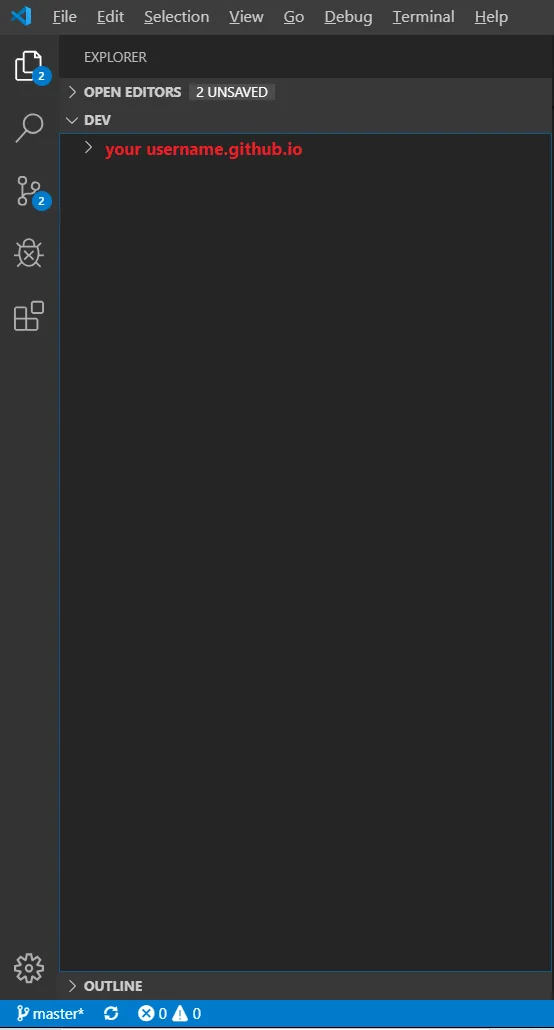
You should see the site’s files on the left.
-
Open
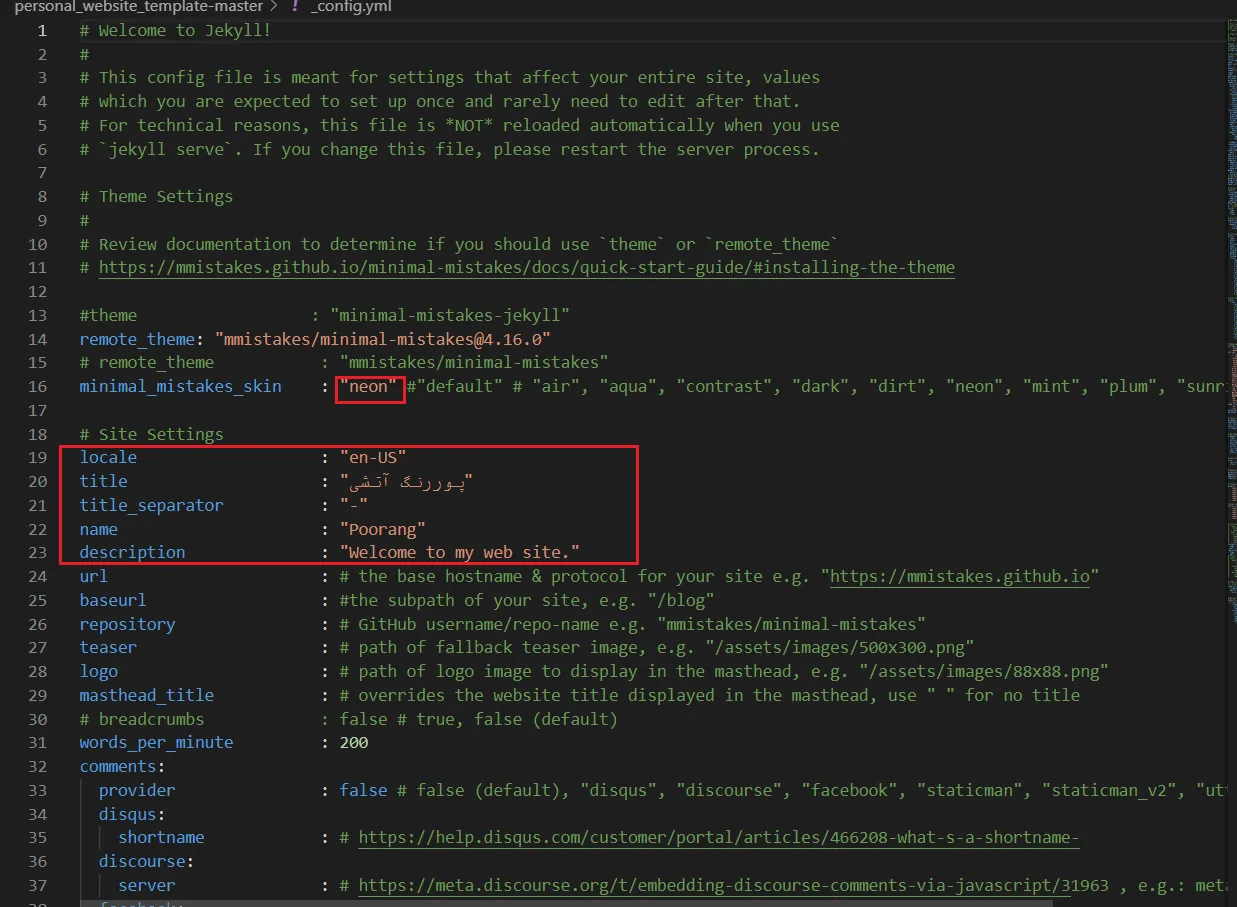
_config.yml. Most of the site’s settings are in this one file.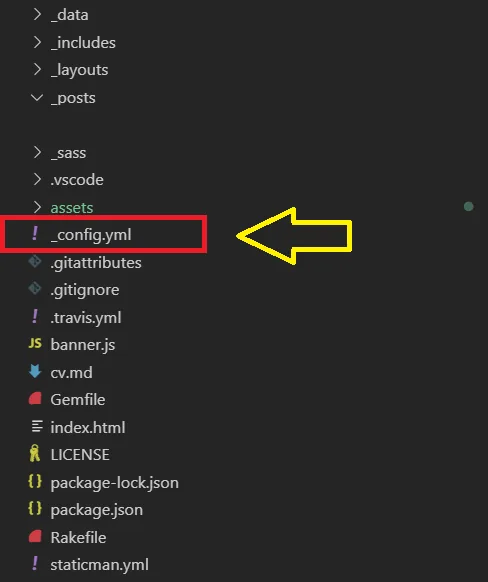
5. Make it yours
-
Change the title, your name, the description and the colour skin.
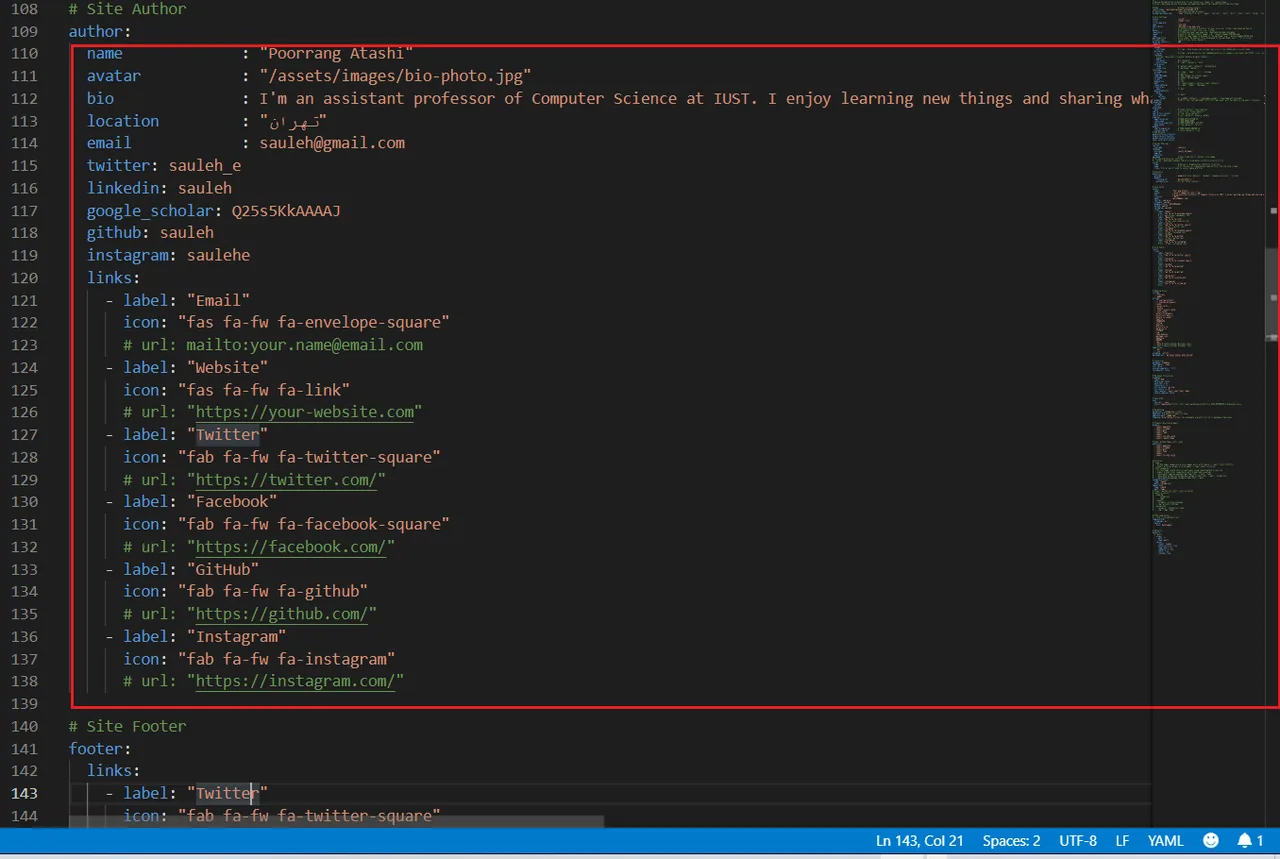
Further down, fill in your bio, email and social links.
-
The pages themselves are Markdown files:
cv.md,courses.md,blog.mdand so on. Edit them like any text file.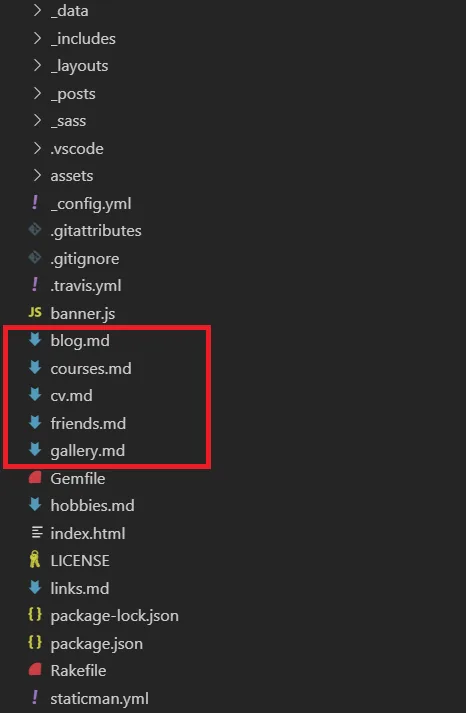
-
To put your changes online, save, then commit and push from the same folder:
git add .
git commit -m "My first changes"
git push
GitHub rebuilds the site after every push. Refresh
yourusername.github.ioafter a minute and you’ll see your changes.